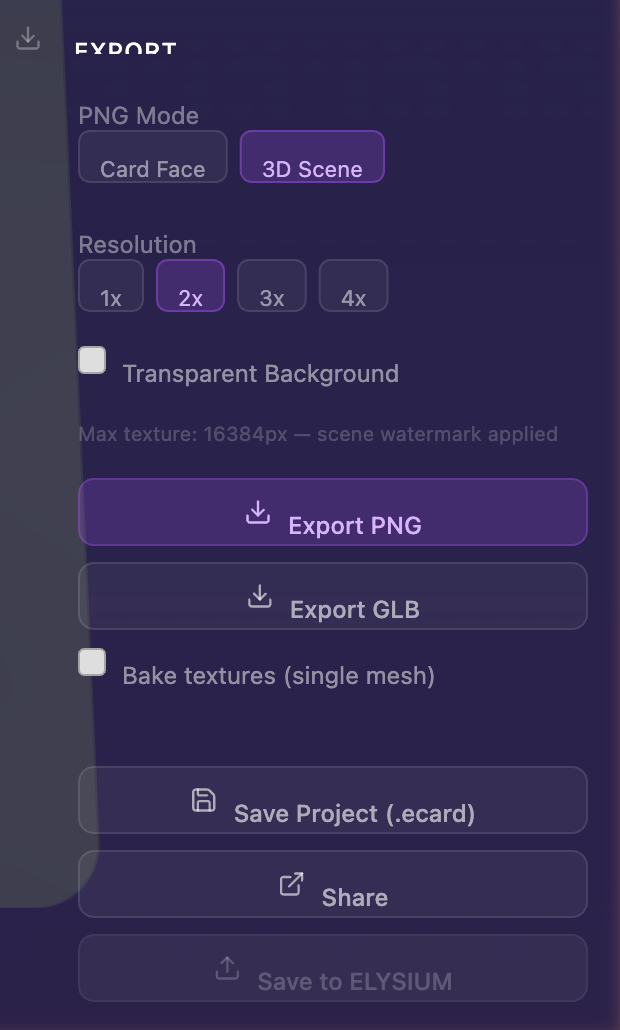
Saving, Exporting, and Sharing
Once your card looks the way you want, the right panel and floating toolbar give you four ways to get it out of the designer:
- Save Project — Download a
.ecardfile (your project template) - Export GLB — A 3D model file for AR, 3D viewers, or game engines
- Export PNG — A flat or rendered image of your card
- Save to ELYSIUM — Upload to the cloud (requires an account)
The right panel section that holds these controls is shown below.
Saving your work
Auto-save
Your design is automatically saved to your browser every time you make a change. If you accidentally close the tab, just reopen the Card Designer — your work will be waiting.
Save Project (the .ecard file)
Click Save Project in the right panel to download a .ecard file. This is the project template for your card — it bundles every image, text block, sticker, color, audio file, material, and effect into a single portable file.
Use the .ecard to:
- Back up your design outside the browser
- Move a project between machines
- Send a fully-editable copy to a collaborator before you've put it in the cloud
- Reuse a card design as the starting point for a new card (this is the "templating" idea — open the file and tweak)
To reload a .ecard, drag it onto the Card Designer landing page or use the Load Saved Project option in the setup wizard.
The .ecard is your portable template. Think of it as the project file for your card — it can serve as the starting point for any number of variations (e.g., "card 1 of 52", "card 2 of 52" using the same artwork base).
Luma signup prompt
The first time you save a project in a session, you may be invited to join the ELYSIUM Luma community. Luma is the events / community platform where ELYSIUM workshops happen — it's optional, and you can dismiss the prompt to continue saving.

Auto-save uses your browser's local storage. If you clear your browser data, it's gone. Save to a .ecard file or save to the cloud to keep your work safe.
Save to the cloud
If you have an ELYSIUM account, you can save your designs to the cloud for access from any device. Click Save to ELYSIUM in the sidebar to open the cloud save dialog.

For full details on cloud saving, project management, and the Projects panel, see Projects and Cloud Save.
Exporting your card
Resolution settings
Most exports respect a top-level Resolution setting that determines the output quality:
| Resolution | When to use |
|---|---|
| Original | Highest fidelity to the source images you uploaded |
| Optimized | Smart compression — recommended for AR delivery, where the visual difference is negligible but file sizes shrink dramatically |
| Insanity (4K) | Maximum resolution — best for posters, prints, or anywhere the asset will be viewed at very large sizes |
For an AR card that ends up on a phone or AR headset, Optimized gives you the best balance of quality and size — typically about 1 MB for a complete GLB. Higher resolutions add bytes without a perceivable visual difference at AR viewing distances.
As a 3D file (GLB)
A GLB is a single-file 3D model format. The Card Designer's GLB export is the file you'd hand to:
- An ELYSIUM AR scene (or any AR runtime)
- A 3D model viewer like gltf-viewer.donmccurdy.com
- A game engine (Unity, Unreal, Godot)
- Any web tool that ingests glTF/GLB
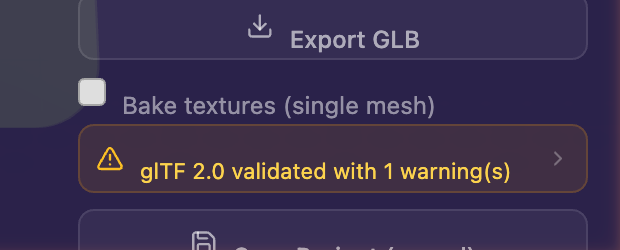
Click Export → GLB to start. The export goes through a few phases (Preparing → Exporting → Validating → Done). If validation surfaces errors, you'll see them listed; toggling Bake Textures on usually resolves them.
Bake Textures toggle
| Setting | What you get |
|---|---|
| On (default) | All layers — backgrounds, gradients, color tints, foreground images, brand logo, text, stickers — are flattened into a single texture per face. Best for compatibility with downstream tools. |
| Off | Each layer is preserved as a separate mesh / material. Best if you plan to re-import the GLB into another ELYSIUM workflow. |

Validating your GLB
Once you've exported a GLB, you can sanity-check it by dropping it into an external 3D viewer such as gltf-viewer.donmccurdy.com. Drag your GLB into the viewer to see exactly how the file will render in any compliant tool.

The card may look different in the external viewer than in the designer — that's expected. The viewer doesn't apply your canvas HDRI, lighting, or canvas effects (parallax, drop shadow, spin), since those are designer-only presentation layers and are not baked into the GLB.
How AR lighting works in ELYSIUM
When the same GLB is loaded into an ELYSIUM AR scene, ELYSIUM applies dynamic real-world lighting — meaning the actual light around your phone or headset is sampled and used to shade the card. A metallic or holographic card placed in a sunlit room will reflect that sunlight; the same card in a dim coffee shop will pick up the warm bulbs nearby.
This is why you don't need to bake heavy lighting into the GLB itself: ELYSIUM does the right thing in real-world conditions automatically.
As an image (PNG)
In the Export section of the right panel, choose PNG export:
- Card Faces mode — Exports the flat artwork of the front or back face. Best for printing.
- 3D Scene mode — Exports the full rendered 3D scene (lighting, effects, the canvas backdrop). Best for sharing online.
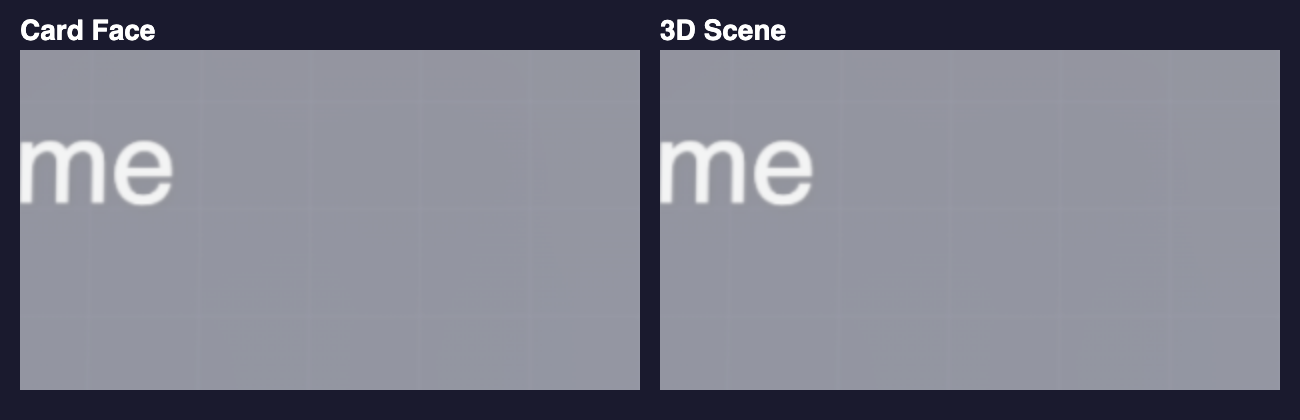
For print-quality output, use Card Faces mode at Insanity (4K) — that gives you 300 DPI at the card's actual physical size.

You can choose to export the front, the back, or both at once. The 3D Scene mode also captures a slight camera move when exporting, so the framing matches what you've set up in the canvas.
Sharing your design
Quick share (same device)
Click the Share button in the export panel to generate a quick local preview link. This stores your card in the browser and gives you a link to preview it.

Click the copy icon to grab the link and share it wherever you like.

Quick share links only work on the same browser and device where they were created. For cross-device sharing with password protection and collaboration features, see Sharing and Privacy.
Cloud sharing
For sharing with anyone — on any device, with optional password protection, expiry dates, and collaboration features — use cloud sharing from the Privacy & Sharing panel in the right sidebar. See Sharing and Privacy for the full guide.
Continue editing, build new, or share — what comes next
After you save, the designer typically gives you a few quick actions:
- Continue Editing — Close the dialog and stay in the designer
- Build New Project — Spin up a fresh project from scratch
- Share Card — Jump straight to creating a cloud share link for what you just saved
If you've signed in, the Projects panel updates with your new save so you can switch projects at any time. See Projects and Cloud Save for the full management workflow.